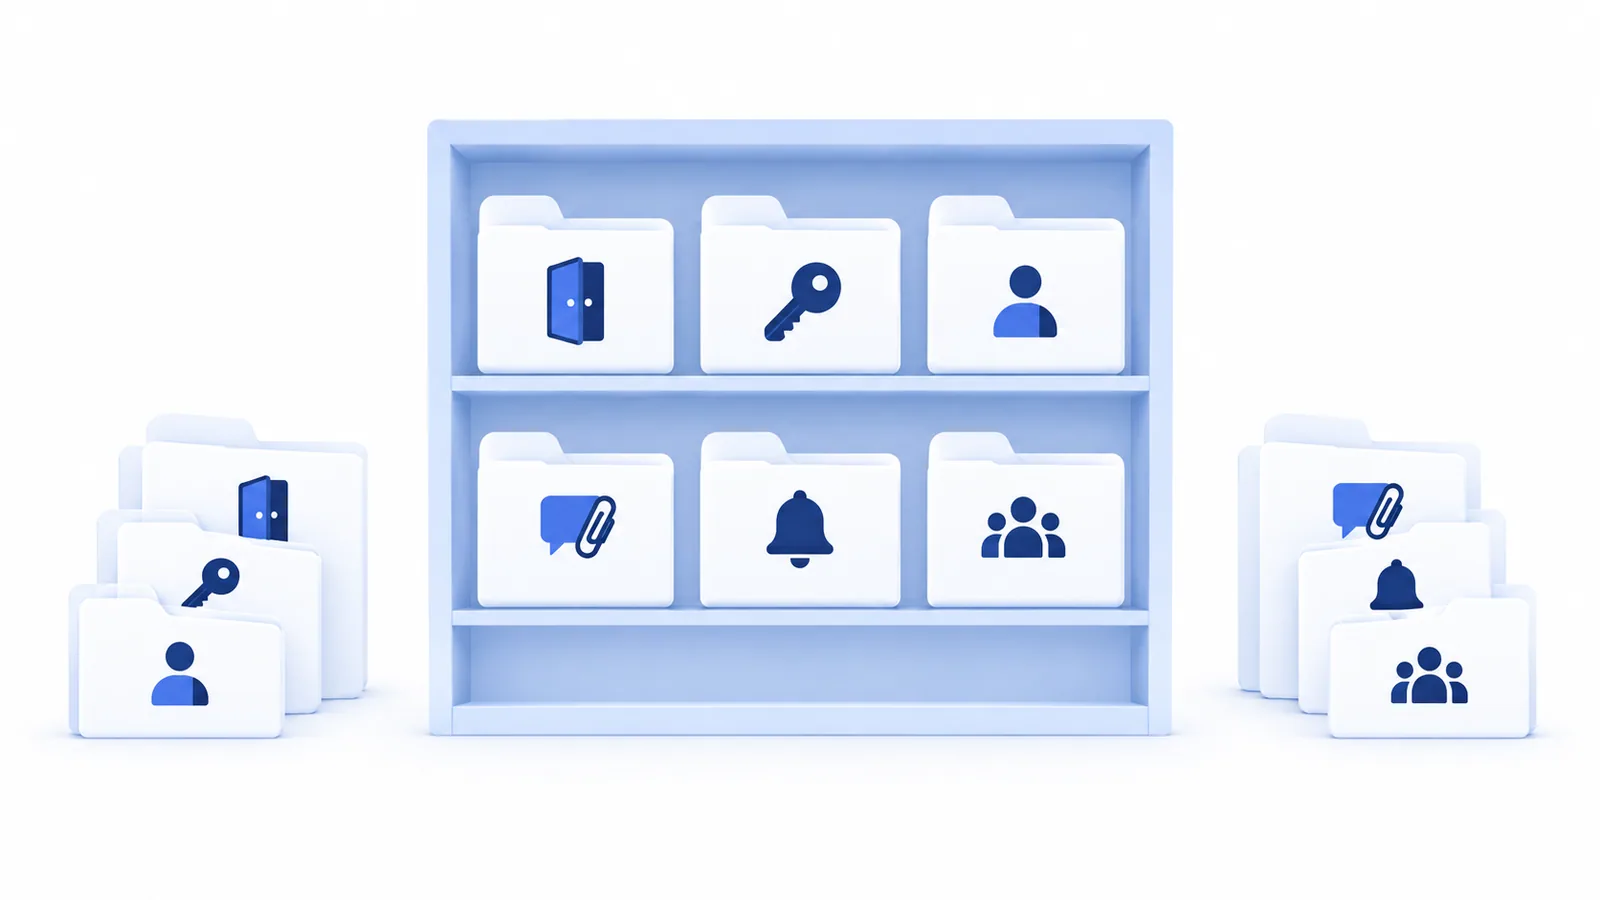
The third app your team builds probably needs a login page, a profile, notifications, and a way to invite people. You have delivered those features before. Yet the next planning session still starts with an empty document, and someone eventually asks the same question: what happens when the invitation expires?
A reusable story map library gives those decisions a home. Each map describes a common user journey, the stories that support it, a useful first release, and the choices that depend on the next product. An AI agent connected through the StoriesOnBoard Model Context Protocol (MCP) server can read that structure and help build a product-specific version.
This guide works through six features: login, password reset, profiles, messages with mentions and attachments, notifications, and team invitations. Each example includes a map, a creation prompt, detailed acceptance criteria, and an adaptation decision. The maps are illustrative examples; the MCP instructions describe a reproducible workflow, rather than a recorded run in a customer workspace.
What a reusable story map library preserves
Consider a small team shipping an internal operations app, a client portal, and a community product. All three have profiles. In the operations app, a profile helps colleagues recognize an employee. In the portal, it identifies the person approving a delivery. In the community, it may be a public page that helps strangers decide whether to connect.
The shared starting point is useful: view details, edit permitted fields, validate changes, save, and show the result. Visibility, identity verification, required fields, and moderation still need a decision for each product. Keeping both the shared journey and those open decisions makes the next discussion more precise.
Store the following with each feature map:
- Purpose and persona: the person using the feature and the outcome they need.
- Journey: goals, ordered steps, and the stories under each step.
- Release slices: a complete first experience and optional extensions.
- Decision notes: assumptions, exclusions, dependencies, and unresolved questions.
- Detailed stories: expected behavior, acceptance criteria, and important failure states.
- Reuse record: the source version and the changes made for a particular app.
A release slice should let someone finish a meaningful task. “Build the login form” leaves the journey incomplete if users cannot understand a failed attempt, leave their session, or return to the page they originally requested. The map makes these relationships visible. Our guide to MVP slicing with story maps develops that planning approach further.
Let each feature determine its own map width. Login and recovery use four steps here; profiles and notifications use five, invitations use six, and messaging uses seven. Separate actions when their stories need their own planning decisions. An empty column in a release means that step has no work in that slice; mentions and attachments, for example, start in the messaging collaboration release.
Build the library with StoriesOnBoard MCP
Start with a connected AI agent and a workspace where you can create and edit maps. The agent supplies the planning and tool calls; MCP supplies access to StoriesOnBoard. Give the agent a short product brief, the intended users, and the feature boundaries before asking it to create cards.
The official MCP tool reference documents map discovery, hierarchy reads, card details, map and card creation, and release operations. The practical sequence is:
- Find the source. Use
ListStoryMapsto locate an existing feature map. Read its hierarchy withGetStoryMapCardsand relevant descriptions withGetStoryMapCardDetails. - Resolve product choices. Turn the brief into proposed goals, steps, stories, and release boundaries. Surface missing decisions for review.
- Create the destination. Use
CreateStoryMap, then read its reference data withGetStoryMapData. - Build the hierarchy. Use
CreateStoryMapCardfor goals, then their steps, then stories under the right steps. The API calls these levelsactivity,task, andsubtask. - Assign release slices. Create releases with
CreateStoryMapRelease; use the supported card operations to place stories in the intended slice. - Read the result back. Check parent relationships, order, release placement, and detailed acceptance criteria against the reviewed plan.
Use returned IDs when building the next level. After an interrupted run, read the destination before retrying: a missing response does not prove that a card was never created. This prevents a recovered connection from producing a second copy of half the board.
Here is the reusable instruction that precedes each feature-specific prompt:
Use the StoriesOnBoard MCP connection for this workspace.
Read any existing feature-library map relevant to this request.
Read the attached product brief and list decisions it leaves open.
Propose goals, ordered steps, stories, and release slices first.
After I approve the proposal, create the destination map.
Create parents before children and use returned IDs.
Put assumptions, acceptance criteria, and dependencies in card details.
Read the completed map back and report any mismatch or unresolved choice.
If a call fails, inspect current state before retrying a write.
The detailed method can also live in a reusable agent skill. Five Skills, One Backlog explains how discovery, map creation, refinement, and review can fit together. The feature library supplies the subject matter those skills work on.
1. Login: help an existing user return to work
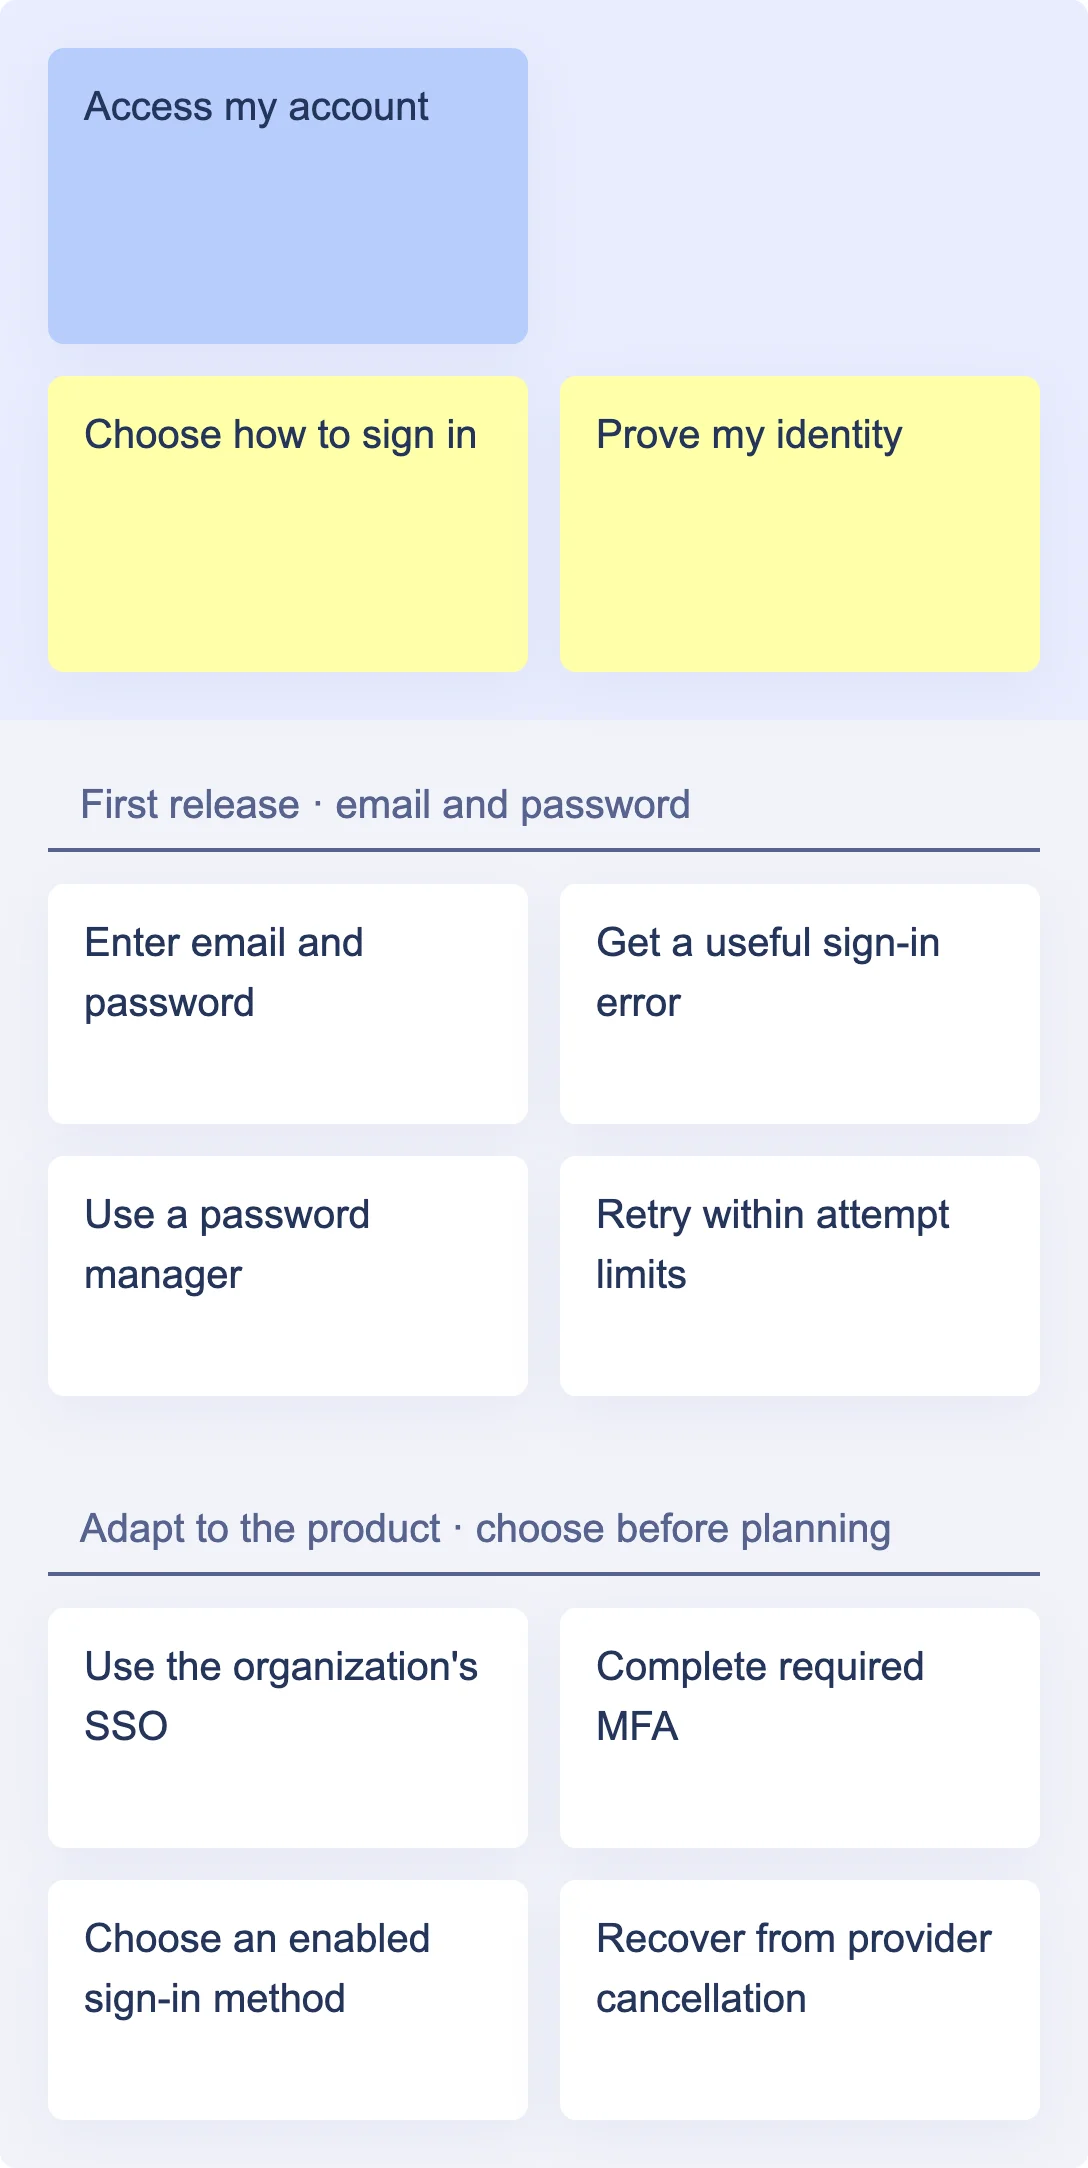
The user arrives with an intention: review a file, answer a message, or continue a task. The login page is one step toward that outcome. Model the journey through successful access and the next destination, including the cases where access cannot be granted.
This example starts with email and password for an app with a single workspace. Its first release covers entry, understandable failure, safe continuation, sign-out, and expiry. SSO and multi-factor authentication appear in the adaptation lane because the product must choose its identity policy. If that policy requires either, move it into the first release.
Return navigation and failed attempts
Continue to my intended destination. As a returning user, I want to reach the item I originally opened after signing in, so I can continue my task.
- Given an allowed internal destination, successful authentication returns the user there after checking their current access.
- A missing or disallowed destination leads to a documented fallback, such as the workspace home.
- The sign-in process does not accept an arbitrary external destination from the request.
Recover from a failed attempt. As a returning user, I want a clear next action when sign-in fails, so I can regain access without guessing.
- An unsuccessful attempt does not create an authenticated session.
- The error explains the next action without revealing whether a particular account exists.
- The user can try again within the agreed attempt limits or open account recovery.
Review identity behavior against your authentication provider and OWASP's authentication guidance, including generic failure responses and controls on repeated attempts. Capture product-facing behavior in the story and implementation controls in its engineering notes.
Choose the right sign-in method
An employee app may use organization SSO exclusively. A community app may offer several sign-in methods. The library should carry both questions into discovery instead of silently imposing the method used by the previous app.
Create and verify the login map
Create a reusable login feature map for returning users.
Use the journey: choose sign-in method, prove identity,
enter the correct workspace, and manage the session.
Assume email/password and one workspace for the initial example.
Include failed attempts, session expiry, sign-out, and safe return navigation.
List SSO, MFA, and multiple workspaces as product decisions.
Required identity controls belong in the first release.
Follow the review, creation, and read-back process above.
MCP focus: create the two goals, attach the four steps to their correct goals, then add the stories. During read-back, check that session stories remain under “Manage my session” and that required authentication choices have not been parked in an optional release.
2. Password reset: make recovery a complete journey
Recovery begins when the user cannot use their usual credentials. It ends when they can sign in again and understand what changed. A successful “email sent” message sits near the beginning of that journey.
The map below starts with recovery through a verified email address. The first release includes valid, expired, and used-link behavior, a validated password change, and a route back to sign-in. Additional recovery methods depend on the product's identity model. Keep the password-reset map connected to login, while giving recovery its own detailed acceptance criteria.
Reset requests and expired links
Request recovery without exposing account membership. As someone unable to sign in, I want to request help using my email address, so I know how to continue.
- The visible confirmation is consistent whether or not an eligible account matches.
- Eligible requests trigger the agreed recovery process, subject to configured request limits.
- The response gives useful next steps, including what to do if the email does not arrive.
Replace an expired or used link. As someone opening an old recovery email, I want to request a fresh link, so I can finish recovery.
- An expired or already-used token cannot change the password.
- The page explains that a new link is needed and provides a route to request one.
- A successful reset follows the chosen session policy and sends a change notification.
OWASP's password-reset guidance covers neutral responses, expiring single-use tokens, and session handling. The exact expiry and identity checks belong to your agreed security design; the template should identify those decisions.
Adapt recovery to the identity provider
For an SSO-only employee app, recovery may belong to the identity provider. Replace the local password-reset steps with the correct provider route and help instructions. Creating a local password for that user would change the product's identity model.
Create and verify the recovery map
Create an account-recovery map linked conceptually to the login map.
Cover request, valid-link access, password replacement, and return to sign-in.
Include missing email, expired or used links, repeat requests,
password validation, change notification, and session-policy decisions.
Separate email/password recovery from the SSO-provider route.
Use neutral public responses and identify unresolved policy choices.
Show a complete first-release journey before creating the map.
MCP focus: put the failure behavior in the relevant story descriptions, then read those descriptions back. Counting the four step columns cannot establish that expired-link behavior or session consequences were captured.
3. Profiles: separate personal details from identity controls
A profile helps someone present the right information to the right audience. Start by identifying that audience. A colleague's display name and avatar may be enough for an internal app; a public community profile introduces a different set of visibility decisions.
The initial map uses a team-visible profile. Its five steps separate viewing, field editing, avatar changes, saving, and audience visibility. Avatar uploads have their own failure and retry behavior, so they get a dedicated column. Email changes, password changes, and account deletion need their own account-management decisions. A reusable profile should make those boundaries explicit.
Avatar uploads and managed fields
Replace my avatar. As a member, I want to update my profile picture, so teammates can recognize me.
- The interface states the accepted file types and size limit before upload.
- A rejected or failed upload leaves the current avatar intact and explains how to retry.
- A successful change appears on the profile; removing it restores the agreed fallback.
Understand which fields I can change. As a member, I want managed fields to be clearly identified, so I know how to correct inaccurate information.
- Fields owned by an organization or identity provider are displayed as read-only.
- The user sees where to request a correction when such a process exists.
- Submitting an edited request cannot bypass the field's ownership rule.
Decide visibility and saving behavior
A client portal may show an approver's name to external participants while keeping their phone number private. Record visibility per field and viewer. One “public profile” switch is too vague when different viewers need different information.
Unsaved edits and concurrent changes also deserve an explicit choice. An autosaved profile and a form with a Save button behave differently; select the interaction before generating acceptance criteria. The map's extension lane is a catalogue of options to assess, not a promise that every app will eventually implement them.
Create and verify the profile map
Create a reusable team-profile map with five steps: view profile,
edit details, change avatar, review/save, and choose visibility.
Start with display name and avatar.
Keep organization-managed identity fields read-only.
Include failed uploads, validation errors, and clear saved-state feedback.
Ask whether edits are autosaved or explicitly submitted.
List public profiles, biography, language, and time zone as adaptations.
Keep identity verification and account deletion outside this feature boundary.
MCP focus: preserve field ownership and audience in card details. When adapting the map, read these details alongside the titles so that “Edit my details” does not become permission to edit every account field.
4. Messaging: connect text, mentions, and attachments
Messaging grows quickly because sending text touches membership, access, files, and attention. A reusable map helps the team specify how those parts work together. Begin with one clear setting: members discussing work in a project conversation.
The first slice delivers reliable text communication. The collaboration slice adds @mentions and attachments together with the access checks and failure handling those capabilities require. Threads, reactions, search, editing, and moderation are further choices for the product brief.
The seven columns separate opening a conversation, writing, mentioning someone, attaching files, sending, reading, and replying. The first release crosses the text journey while leaving the mention and attachment columns empty. In the next slice, those columns make eligibility checks and upload recovery visible alongside delivery.
Mentions and file-upload recovery
Mention an eligible teammate. As a participant, I want to mention someone who can access the conversation, so I can direct their attention to a relevant message.
- The mention picker offers people who are eligible under the conversation's membership rules.
- Sending resolves the mention to a stable person identifier, so a later display-name change does not retarget it.
- A mention creates the agreed notification only after the message is successfully sent.
- If access changes before sending, the user gets a clear way to remove or correct the mention.
Attach a file without losing my message. As a participant, I want to recover from a failed upload, so I can finish sending useful information.
- The composer distinguishes uploading, ready, and failed attachment states.
- The user can retry or remove a failed attachment while retaining the message text.
- The send action follows a documented rule while uploads are pending; this example waits until each attachment is ready or removed.
- Every file download checks the requester's current access, including after membership changes.
The second story forces a real product decision. Another app could send text immediately and deliver files afterward, but it would need to explain that partial state to both sender and recipient. Keeping this decision in the reusable map avoids rediscovering it through support tickets.
Set conversation boundaries and editing rules
In an agency portal, staff may hold an internal conversation alongside a client-visible one. A mention must respect that boundary. Adding a client's name to an internal message should not make its text, files, or notification preview visible outside the internal audience.
Also decide what survives editing and deletion. A deleted message might leave a tombstone so replies remain understandable. A removed attachment needs a clear unavailable state. These choices belong beside the story that creates the content, even if the editing interface comes in a later release.
Create and verify the messaging map
Create a project-messaging map for members of the same workspace.
Use separate steps for opening, writing, mentioning, attaching,
sending, reading, and replying.
First release: accessible conversations, text composition,
pending/sent states, retry without duplication, unread handling, and replies.
Next slice: @mentions and attachments, including their access rules.
Leave those two step columns empty in the text-only first release.
Refine mention eligibility, stable identity, upload failure,
send behavior during upload, and permission checks on file download.
Identify dependencies on membership and notifications.
Ask which conversations, if any, external clients may see.
MCP focus: create the story hierarchy first, then refine selected message stories with their acceptance criteria. Read back the release placement of mentions and files together with their failure and access stories. A slice containing only the visible controls is incomplete.
5. Notifications: close the loop from event to action
A notification is useful when it reaches an eligible person, explains what changed, and leads to an action they can still take. Treat that sequence as a journey. It exposes missing work that a single “add notification bell” ticket tends to hide.
This map begins with in-app notifications. Email, push, digests, and quiet hours are separate product choices. Distinguish optional activity updates from required account or security messages, and document which preferences apply to each.
Five steps distinguish receiving and understanding an update, opening its destination, managing read status, and choosing future updates. Marking one item as read changes the current inbox; a preference changes future delivery. Keeping them in separate columns prevents the two behaviors from becoming one vague settings story.
Destinations and email preferences
Open the relevant item. As a recipient, I want an update to lead to its source, so I can understand the context and respond.
- Selecting an update opens its intended item after checking current access.
- A deleted or inaccessible item produces a useful explanation without exposing restricted details.
- When sign-in is required, successful authentication resumes the allowed destination.
Control optional email updates. As a member, I want to choose which activity emails I receive, so the product fits my working habits.
- Settings name the event types and channels they affect.
- A saved preference affects future eligible deliveries according to a documented cut-off rule.
- The interface explains account or security messages that are governed separately.
Choose channels and delivery behavior
A collaboration app may need an immediate mention alert. A reporting tool may need a daily summary. Pick channels from the user's response window and context; the fact that another app has push notifications does not establish demand here.
Delivery states need careful language. An event being queued, handed to an email provider, and read by a person are different observations. Choose which ones the team actually needs and can measure. Keep that distinction in the map's notes rather than calling every successful provider response “read.”
Create and verify the notification map
Create a notification map for project activity and @mentions.
Start with in-app updates: eligible event, understandable context,
accessible destination, read-state handling, and future preferences.
Give read status and future-delivery choices separate step columns.
Cover duplicate events and destinations that become unavailable.
Keep email, push, digests, and quiet hours as explicit product choices.
Separate optional activity preferences from account/security messages.
Identify the login and permission dependencies before creating cards.
MCP focus: read the messaging and login maps before proposing the notification stories. Reuse their event names and destination behavior. A shared feature library helps most when neighbouring maps describe the same interaction consistently.
6. Invitations and roles: make membership a lifecycle
An invitation has several outcomes: it can be accepted, expire, be revoked, or reach someone who already belongs to the workspace. A member can later change role or leave. Keeping those states in one map helps the team see who controls each transition.
The initial example assumes an authorized workspace administrator invites one person at a time and assigns a supported role. The first release includes the invitation's failure states and membership removal. Bulk invitations, guests, ownership transfer, and SSO are possible adaptations.
The six steps follow the actual handoff: choose the recipient, assign a role, send, manage pending invitations, accept with the right identity, and manage membership. The first four belong to the administrator’s invitation work; acceptance introduces the invitee before the membership lifecycle continues.
Invitation acceptance and access removal
Accept with the intended identity. As an invited person, I want to join with the correct account, so access is attached to me.
- The acceptance page identifies the destination workspace and intended recipient appropriately.
- A user signed in with another account can switch accounts before accepting.
- An expired, revoked, or already-used invitation follows its defined outcome without creating duplicate membership.
Remove access without leaving an unmanaged workspace. As an administrator, I want to remove a member when permitted, so workspace access reflects the current team.
- The acting administrator can remove only memberships allowed by the role policy.
- Protected content and file requests enforce the changed membership.
- The final required administrator cannot be removed until an eligible replacement is in place.
Define guest access and membership scope
A guest in a client portal may see only one project. Treat that as a scope as well as a role. Record which project the invitation grants, what happens when it is archived, and whether the guest appears in mention pickers outside that scope.
Account existence and membership are also different facts. Someone can already have an account while needing a new workspace membership. The acceptance flow should handle that case deliberately. Our guide to access control management provides broader context for these product decisions.
Create and verify the invitation map
Create a team-invitation map for a workspace administrator and invitee.
Use six steps: choose recipient, assign role, send invitation,
manage pending invitations, accept, and manage membership.
Include duplicate membership, wrong signed-in identity, expiry,
revocation, role limits, and protection of the final administrator.
Keep bulk invitations and restricted guests as separate adaptations.
Link membership changes to messaging, files, and notification access.
MCP focus: preserve both actors when refining the map. The administrator sends and revokes; the invitee accepts and resolves identity. Reading those details back helps detect stories that accidentally give either actor the other's authority.
Organize the six maps into a library people can maintain
Use a consistent name such as “Feature library — Login” and keep an owner, version, and short scope note in each map's description. A library entry should state whether it is a generic starting point or a pattern validated in one of your products. That distinction tells the next team how much confidence to place in it.
StoriesOnBoard documents collections for grouping maps and templates for starting new maps from an existing structure. Use the relevant workspace interface to organize the collection and save templates. The MCP workflow above uses documented map and card operations; collection management and template conversion are separate interface steps in this guide.
For each entry, record a small set of maintenance facts:
- Owner: who reviews proposed improvements.
- Version: the source revision used by a product team.
- Applicability: relevant audiences, identity model, and assumptions.
- Open decisions: choices a new product must answer.
- Lessons: the observation that justified a change, such as a failed-upload case found in testing.
Product-specific maps should retain their own decisions. Updating the library does not automatically revise every product that started from it. Review the change, identify affected products, and decide whether each needs an update. An invitation rule discovered in an enterprise app may be irrelevant to a single-user tool.
Adapt the library to a new client portal
Suppose an agency is building a portal where clients review deliverables and discuss revisions. Staff belong to several projects; clients see only their own projects. Clients can comment and attach files, but cannot invite more people. Staff use SSO; clients use email and password.
That brief changes all six maps in concrete ways:
| Feature | Decision for this portal |
|---|---|
| Login | Support the two chosen identity routes and resume the allowed project after sign-in. |
| Recovery | Provide local password reset for clients and provider recovery for staff. |
| Profile | Show a recognizable name and avatar; keep internal contact details private. |
| Messaging | Limit client conversations, mentions, and file access to the permitted project. |
| Notifications | Notify eligible participants about mentions and review requests; handle removed access. |
| Invitations | Let authorized staff invite clients into a specific project with a fixed client role. |
Give the agent the portal brief and ask for a proposed change list before creating the destination map:
Read our six feature-library maps and this client-portal brief.
For each source story, propose: keep, adapt, omit, or ask.
Explain adaptations using the brief and preserve the source reference.
Identify cross-feature decisions, especially identity and project access.
Propose an end-to-end first release from invitation to review and reply.
After approval, create the portal map without changing the source library.
Read the result back and list unresolved questions.
Now test one connected journey: an invited client accepts, signs in, updates their display name, opens a deliverable, replies with a file, and receives a response notification. Then change a condition: revoke their project access before they open the notification. The destination, preview text, conversation, and attachment download must all follow the same access decision.
That is why the final product needs its own coherent story map. Feature maps provide reusable detail; the product journey establishes how those details fit together. Use a story map gap analysis to look for missing transitions, conflicting rules, and stories that no longer serve the brief.
Make the next project improve the starting point
When testing uncovers a missing case, ask whether it is broadly reusable. “Keep message text after an attachment fails” probably belongs in the library. “Require this client's contract code before sending” probably belongs in that client's product map.
Have the agent propose the reusable improvement with its source story, the observed problem, and the acceptance-criteria change. Review it, update the library version, and record which products may be affected. This keeps the collection small enough to understand while preserving lessons that would otherwise disappear into closed tickets.
Start with one feature your team has already shipped several times. Read its existing stories, test cases, and support notes; map the full user journey; then use the StoriesOnBoard MCP workflow to create and check the reusable version. Add the next feature when you have enough context to make its decisions useful. Over time, the library becomes a shared record of how your team builds common capabilities and where each new product needs different choices.